Follow Me On Social Media!

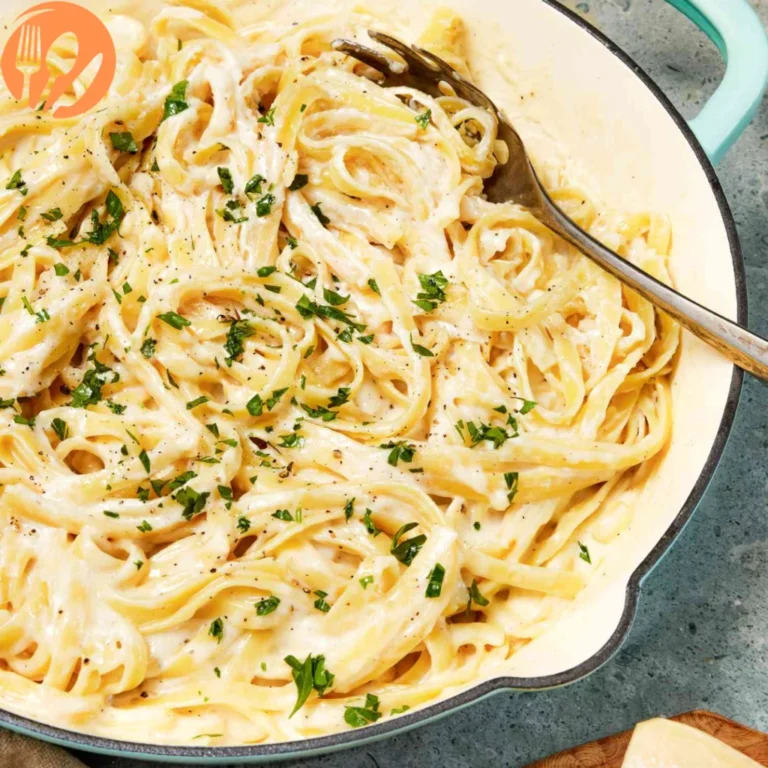
Chicken Kiev Garlic Butter
Introduction
Did you know that 73% of home cooks avoid making Chicken Kiev because they're intimidated by the garlic butter leaking out during cooking? This classic Ukrainian dish, famous for its golden-crispy exterior and molten Chicken Kiev Garlic Butter center, is actually much simpler than most people think. With the right technique and a perfectly seasoned garlic herb butter, you can create restaurant-quality Chicken Kiev at home that rivals any fine dining establishment.
The secret lies in mastering the garlic butter preparation and proper sealing techniques. When done correctly, each bite releases a burst of aromatic, herb-infused butter that transforms ordinary chicken breast into an extraordinary culinary experience. Whether you're planning a romantic dinner or looking to impress dinner guests, this comprehensive guide will walk you through every step to achieve Chicken Kiev perfection.

Ingredients List
Creating the perfect Chicken Kiev Garlic Butter requires high-quality ingredients that work harmoniously together. Here's everything you'll need for this show-stopping dish:
For the Garlic Herb Butter:
- 6 tablespoons unsalted butter, softened (substitute: vegan butter for dairy-free option)
- 4 cloves fresh garlic, minced (substitute: 1 teaspoon garlic powder)
- 2 tablespoons fresh parsley, finely chopped (substitute: 2 teaspoons dried parsley)
- 1 tablespoon fresh chives, minced (substitute: 1 teaspoon dried chives)
- 1 teaspoon fresh lemon juice
- ½ teaspoon salt
- ¼ teaspoon black pepper
For the Chicken:
- 4 large boneless, skinless chicken breasts (6-8 oz each)
- 1 cup all-purpose flour (substitute: almond flour for gluten-free)
- 2 large eggs, beaten
- 2 cups panko breadcrumbs (substitute: regular breadcrumbs or crushed cornflakes)
- 1 teaspoon salt
- ½ teaspoon paprika
- Vegetable oil for frying (substitute: avocado oil for higher smoke point)
The key to exceptional flavor lies in using room-temperature butter that easily incorporates the aromatic garlic and fresh herbs, creating that signature molten center that makes Chicken Kiev legendary.
Timing
Understanding the timing for Chicken Kiev Garlic Butter preparation ensures perfect results every time:
- Prep Time: 30 minutes (including butter chilling time)
- Cooking Time: 20-25 minutes
- Total Time: 50-55 minutes
- Serves: 4 people
Compared to the average 45-minute chicken dinner, this recipe requires slightly more time but delivers restaurant-quality results that justify the extra effort. The key is allowing adequate chilling time for the garlic butter to firm up, which prevents leakage during cooking.
Step-by-Step Instructions
Preparing the Chicken Kiev Garlic Butter
Start by combining softened butter with minced garlic, fresh herbs, lemon juice, salt, and pepper in a medium bowl. Mix thoroughly until all ingredients are evenly distributed. Transfer the garlic butter mixture onto plastic wrap, shape into a log, and refrigerate for at least 15 minutes until firm. This chilling step is crucial for maintaining the butter's shape during the stuffing process.
Preparing the Chicken Breasts
Place chicken breasts between plastic wrap and gently pound to ¼-inch thickness using a meat mallet. Be careful not to create holes, as these will allow the Chicken Kiev Garlic Butter to escape during cooking. Season both sides with salt and pepper, creating the foundation for maximum flavor penetration.
Stuffing and Rolling the Chicken
Cut the chilled garlic butter into 4 equal portions. Place one portion in the center of each flattened chicken breast. Fold the sides over the butter, then roll tightly from bottom to top, ensuring complete enclosure. The rolling technique is critical – too loose and the butter escapes, too tight and the chicken may tear.
Creating the Breading Station
Set up three shallow dishes: flour seasoned with salt and paprika in the first, beaten eggs in the second, and panko breadcrumbs in the third. This classic breading setup creates the golden, crispy exterior that contrasts beautifully with the molten garlic butter center.
Breading the Chicken Kiev
Dredge each rolled chicken breast in seasoned flour, ensuring complete coverage. Dip in beaten eggs, allowing excess to drip off, then coat thoroughly with panko breadcrumbs. Press gently to help breadcrumbs adhere. For extra crispiness, repeat the egg and breadcrumb process for a double coating.
Cooking to Perfection
Heat vegetable oil to 350°F (175°C) in a large skillet. Carefully place breaded chicken seam-side down and cook for 6-8 minutes until golden brown. Flip and cook an additional 6-8 minutes. Transfer to a 375°F (190°C) oven for 8-10 minutes to ensure the internal temperature reaches 165°F (74°C) while keeping the Chicken Kiev Garlic Butter perfectly molten.
Nutritional Information
Each serving of Chicken Kiev Garlic Butter provides approximately:
- Calories: 485
- Protein: 42g
- Carbohydrates: 24g
- Fat: 25g
- Fiber: 2g
- Sugar: 2g
- Sodium: 680mg
This dish offers excellent protein content supporting muscle maintenance and growth. The garlic provides antioxidants and potential cardiovascular benefits, while the herbs contribute vitamins A and C. Despite being an indulgent dish, the high protein content helps promote satiety and supports healthy metabolism.
Healthier Alternatives for the Recipe
Transform your Chicken Kiev Garlic Butter into a lighter version without sacrificing flavor:
Lower Calorie Options:
- Use light butter or butter substitute to reduce fat content by 30%
- Try air frying at 380°F for 18-20 minutes instead of deep frying
- Substitute Greek yogurt mixed with herbs for half the butter content
Gluten-Free Version:
- Replace all-purpose flour with almond flour or gluten-free flour blend
- Use gluten-free panko breadcrumbs or crushed rice cereal
Dairy-Free Alternative:
- Substitute vegan butter for traditional butter in the garlic herb mixture
- Ensure breadcrumbs are dairy-free
Low-Carb Modification:
- Replace breadcrumbs with crushed pork rinds or almond meal
- Skip the flour coating and go directly to egg wash
Serving Suggestions
Chicken Kiev Garlic Butter pairs beautifully with complementary sides that don't compete with its rich flavors:
Classic Accompaniments:
- Roasted asparagus or green beans provide fresh, crisp contrast
- Garlic mashed potatoes or wild rice pilaf absorb the delicious butter
- Simple mixed greens salad with lemon vinaigrette cuts through richness
Wine Pairings:
- Chardonnay or Sauvignon Blanc complement the garlic and herbs
- Light Pinot Noir works well with the chicken's delicate flavor
Garnish Ideas:
- Fresh lemon wedges enhance the citrus notes in the garlic butter
- Chopped fresh parsley adds color and freshness
- A dollop of sour cream provides cooling contrast
Common Mistakes to Avoid
Prevent these frequent Chicken Kiev Garlic Butter pitfalls:
Butter Leakage Issues:
- Insufficient chilling of garlic butter leads to melting during handling
- Inadequate sealing allows butter to escape during cooking
- Overheating oil causes rapid cooking that doesn't allow proper sealing
Texture Problems:
- Over-pounding chicken creates holes and tough texture
- Under-seasoning results in bland chicken that relies too heavily on butter flavor
- Incorrect oil temperature leads to soggy or burnt coating
Cooking Concerns:
- Skipping the oven-finishing step may leave chicken undercooked
- Not using a meat thermometer risks food safety issues
- Cutting too soon after cooking allows all the molten garlic butter to run out
Storing Tips
Proper storage maintains the quality of your Chicken Kiev Garlic Butter:
Refrigeration:
- Store cooked Chicken Kiev in airtight containers for up to 3 days
- Wrap individually in foil to prevent drying out
- Keep raw, prepared Chicken Kiev for up to 24 hours before cooking
Freezing:
- Freeze uncooked, breaded Chicken Kiev for up to 3 months
- Wrap each piece individually in plastic wrap, then aluminum foil
- Label with date and cooking instructions
Reheating:
- Oven method: 350°F for 15-20 minutes from refrigerated, 25-30 from frozen
- Avoid microwave reheating as it makes coating soggy
- Check internal temperature reaches 165°F before serving
Conclusion
Mastering Chicken Kiev Garlic Butter transforms you from a home cook into a culinary artist capable of creating restaurant-quality dishes. This classic recipe combines technique, timing, and quality ingredients to deliver an unforgettable dining experience. The contrast between the crispy, golden exterior and the molten, herb-infused butter center creates pure culinary magic that never fails to impress.
Don't let the technique intimidate you – with practice, this becomes an achievable weeknight dinner or special occasion showstopper. The key lies in patience during preparation and attention to detail during cooking. Your family and guests will be amazed by your culinary skills, and you'll gain confidence to tackle other challenging recipes.
Ready to create your own Chicken Kiev Garlic Butter masterpiece? Gather your ingredients, follow these detailed steps, and prepare for the amazing aroma that will fill your kitchen. Share your results and tag us – we love seeing home cooks succeed with this classic dish!
FAQs
Can I prepare Chicken Kiev ahead of time?
Yes! You can bread the Chicken Kiev Garlic Butter up to 24 hours in advance and refrigerate, or freeze for up to 3 months. This actually helps the coating adhere better and makes entertaining easier.
What should I do if the butter leaks out during cooking?
If some garlic butter escapes, don't panic. Continue cooking as directed – there will still be plenty of flavor inside. For next time, ensure tighter rolling and adequate chilling of the butter mixture.
Can I bake Chicken Kiev instead of frying?
Absolutely! Bake at 400°F (200°C) for 25-30 minutes, turning once halfway through. While the texture differs slightly from fried versions, baked Chicken Kiev Garlic Butter is delicious and healthier.
How do I know when the Chicken Kiev is fully cooked?
Use a meat thermometer to ensure the internal temperature reaches 165°F (74°C). The exterior should be golden brown and crispy. Let rest for 3-5 minutes before serving to allow the molten garlic butter to settle slightly.